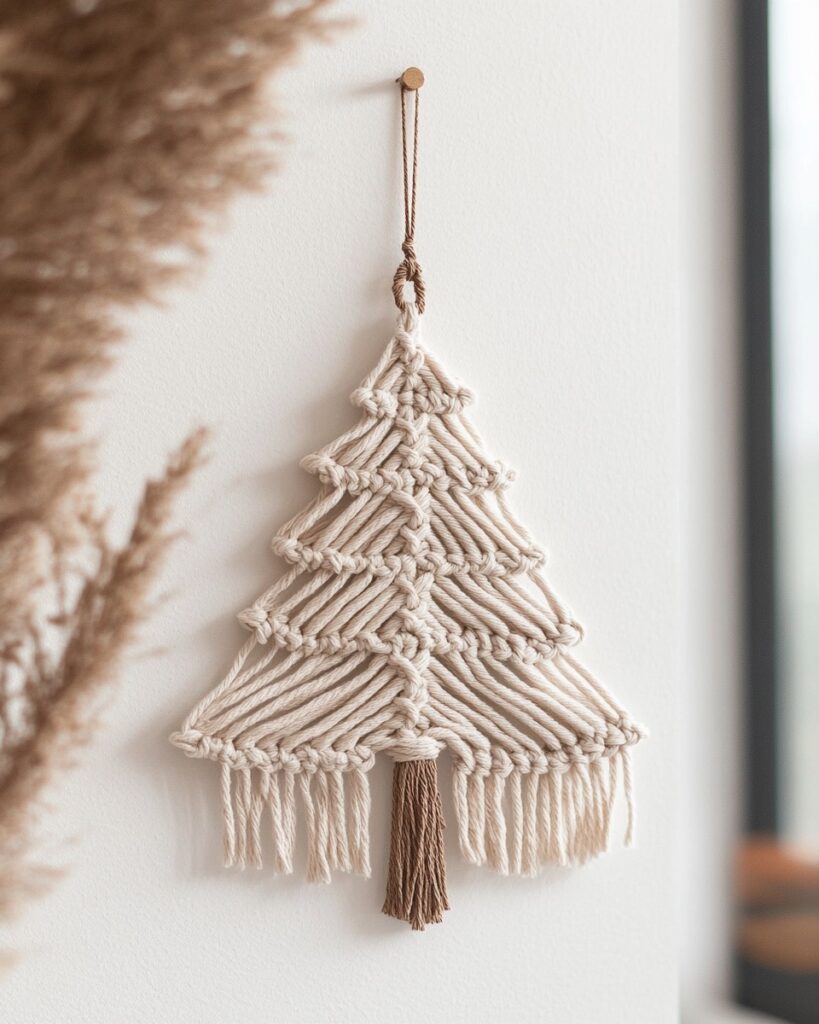
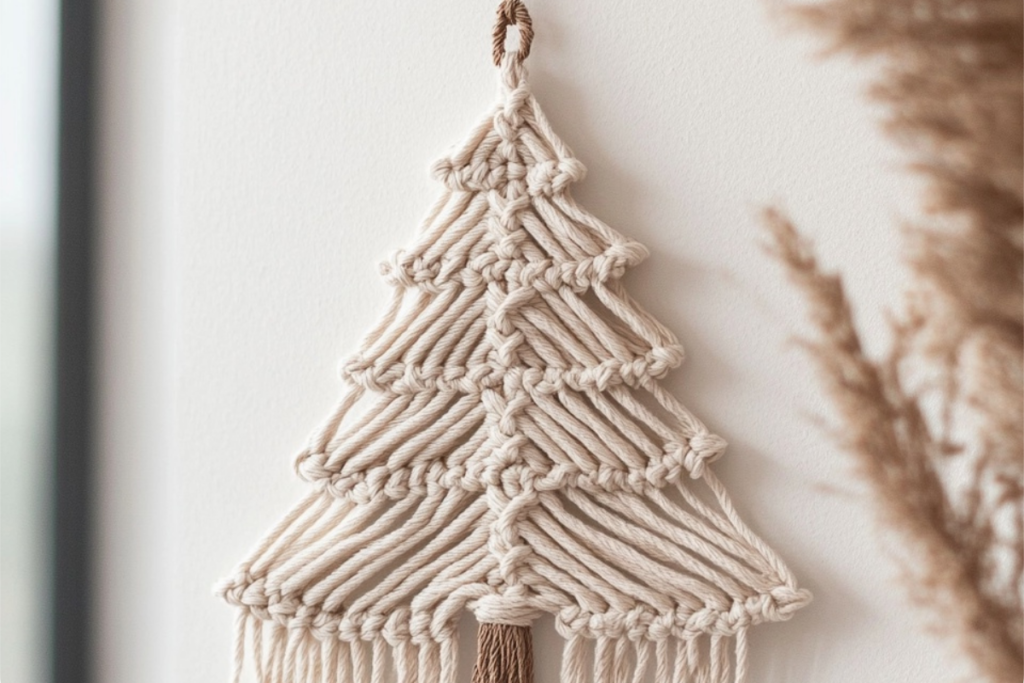
Add a cozy, handmade touch to your decor with this charming Crochet tree autumn! This pattern is beginner-friendly and works up quickly, making it a great project for festive decorating or thoughtful gifting. Featuring beautiful texture and a minimalist design, this piece is perfect for modern or rustic interiors.
Materials & Supplies
- Yarn: Worsted weight cotton yarn (e.g., Lion Brand 24/7 Cotton or Bernat Handicrafter)
- Hook Size: 5.0 mm (H-8)
- Additional Tools:
- Scissors
- Yarn needle
- Wooden dowel or stick (for hanging)
- Tape measure
- Optional: Tassel maker or cardboard for fringe
Size & Gauge Information
- Finished Size: Approximately 12” wide x 16” tall (excluding hanging loop and tassel)
- Gauge: Not crucial for this project.
- Resizing Tips: Use a different yarn weight or adjust the starting chain to change the size.
Crochet Abbreviations & Terms
(US Terminology)
- CH – Chain
- SC – Single Crochet
- HDC – Half Double Crochet
- DC – Double Crochet
- SL ST – Slip Stitch
- Rep – Repeat
Step-by-Step Instructions
Step 1: Create the Base Triangle
- Foundation Row: CH 2.
- Row 1: Work 2 SC into the second CH from hook. CH 1, turn. (2 stitches)
- Row 2: 2 SC into each stitch across. CH 1, turn. (4 stitches)
- Row 3: SC in the first stitch, 2 SC in the next, SC across. CH 1, turn. (5 stitches)
- Continue Increasing: Repeat Row 3 until you have 40 stitches across.
- Fasten off and weave in the ends.
Step 2: Create the Tree Texture
- Attach yarn at the top of the triangle.
- Using slip stitches, create diagonal lines across the tree (optional).
- For extra texture, surface crochet zig-zag lines across the triangle.
Step 3: Add the Tree Trunk
- Attach brown yarn at the bottom center of the triangle.
- CH 1, SC in the next 6 stitches.
- Work 4 rows of SC to form a small rectangular trunk.
- Fasten off and weave in the ends.
Step 4: Add Fringe & Hanging Loop
- Cut 6-inch yarn strands and attach them to the bottom using a lark’s head knot.
- Trim the fringe evenly.
- Attach yarn at the top and create a hanging loop (CH 30, SL ST to secure).
Finishing & Styling
- Blocking: Lightly steam block your tree to smooth stitches.
- Hanging: Insert a wooden dowel through the top row and attach string for hanging.
- Styling Ideas: Hang on a gallery wall, fireplace, or gift it to a friend!
Customization & Bonus Tips
- Color Variations: Use green for a classic look or beige for a boho aesthetic.
- Stitch Modifications: Add bobble stitches for extra texture.
- Beginner Tip: Use stitch markers to keep track of increases.
Enjoy making this festive crochet wall hanging, and happy crocheting!