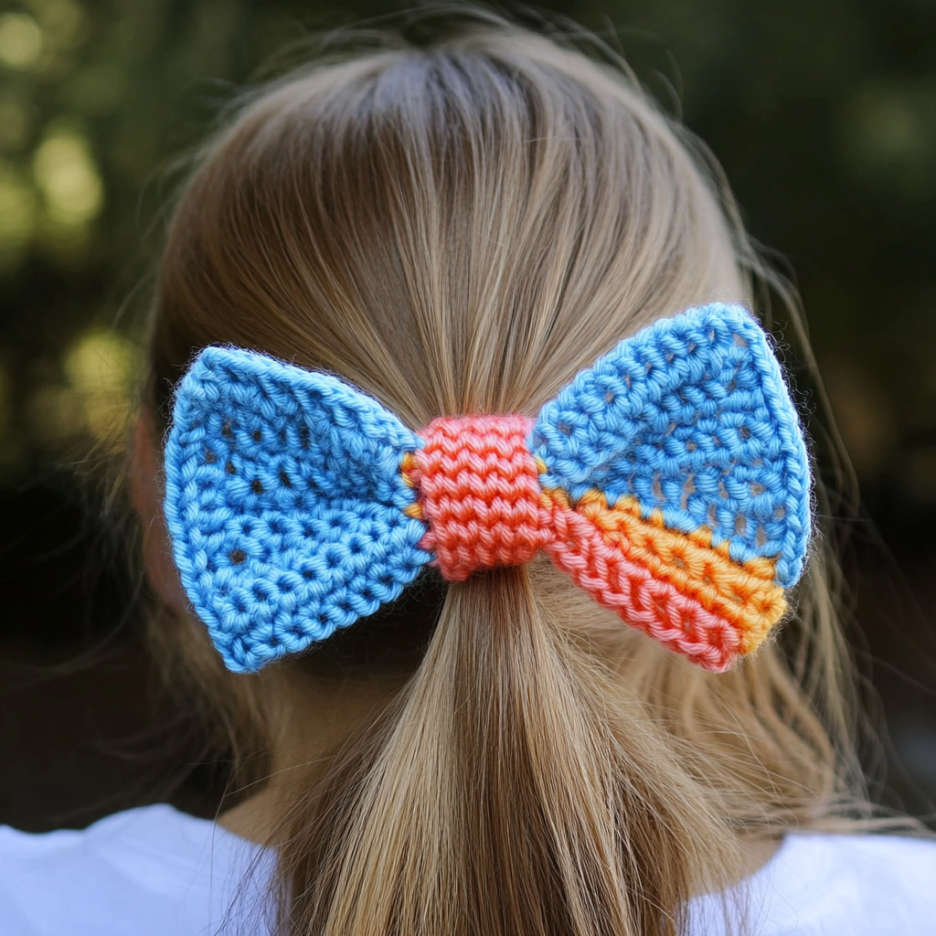
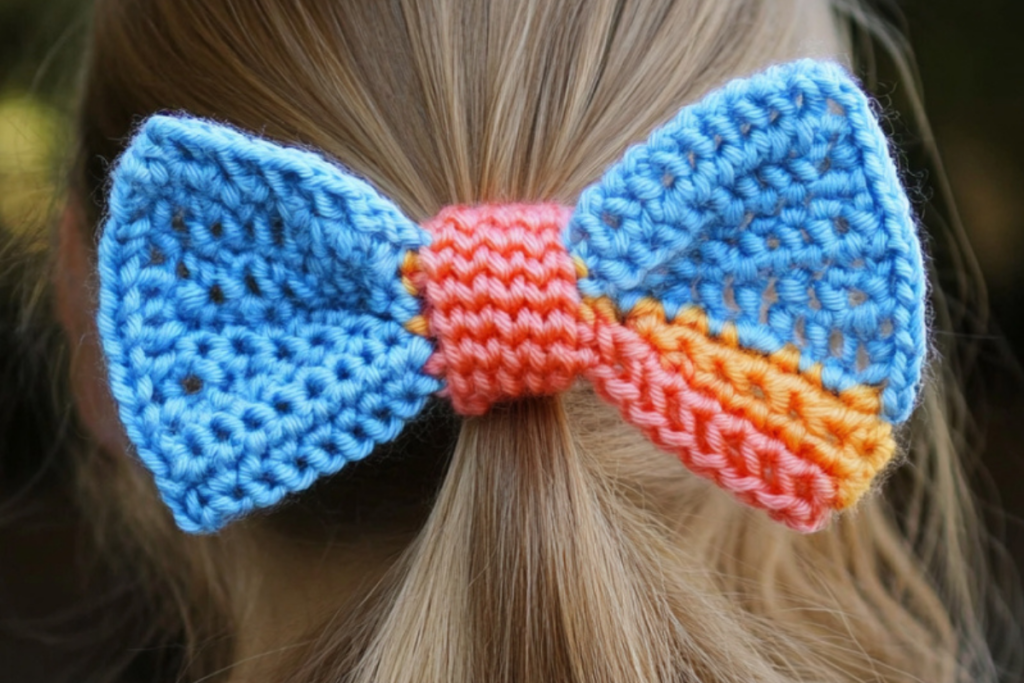
This adorable Crochet Hair Bow Pattern is perfect for adding a touch of handmade charm to your hairstyle or gifting to a loved one. Whether you’re dressing up for a special occasion or just want to add a cute accessory to your everyday look, this bow is quick, easy, and fun to make. Designed for beginners, this pattern uses basic stitches and requires minimal materials. Plus, it’s a great way to use up leftover yarn!
Key Features:
- Quick to make (under an hour!)
- Customizable with different colors and sizes
- Perfect for gifting or accessorizing
Materials & Supplies
Here’s what you’ll need to get started:
- Yarn: Worsted weight (Category 4) yarn in your choice of color. (Recommended brands: Red Heart Super Saver, Lion Brand Vanna’s Choice, or any soft acrylic yarn.)
- Crochet Hook: 5mm (H/8) hook.
- Other Tools:
- Yarn needle for weaving in ends
- Scissors
- Stitch marker (optional, but helpful for marking the center of the bow)
- Small hair clip or elastic (to attach the bow)
Size & Gauge Information
- Finished Size: Approximately 4 inches wide and 2 inches tall (adjustable by changing hook size or yarn weight).
- Gauge: Not critical for this project, but aim for a tight stitch to keep the bow sturdy.
- Resizing Tips: Use a larger hook and thicker yarn for a bigger bow, or a smaller hook and lighter yarn for a daintier look.
Crochet Abbreviations & Terms
This pattern uses US crochet terms. Here’s a quick guide to the abbreviations:
- Ch: Chain
- SC: Single crochet
- HDC: Half double crochet
- DC: Double crochet
- Sl st: Slip stitch
- St: Stitch
Step-by-Step Instructions
Part 1: The Bow
- Foundation Row:
- Ch 15.
- Row 1: Starting in the second ch from the hook, SC in each ch across. (14 SC)
- Ch 1, turn.
- Bow Body:
- Row 2-6: SC in each st across. Ch 1, turn at the end of each row.
- After Row 6, fasten off and leave a long tail (about 12 inches) for sewing.
- Shaping the Bow:
- Fold the rectangle in half lengthwise, with the right sides facing out.
- Use the long tail to sew the short edges together, creating a loop.
- Flatten the loop to form the bow shape.
Part 2: The Center Band
- Foundation Row:
- Ch 8.
- Row 1: Starting in the second ch from the hook, SC in each ch across. (7 SC)
- Ch 1, turn.
- Band Body:
- Row 2: SC in each st across. Ch 1, turn.
- Row 3: SC in each st across. Fasten off, leaving a long tail for sewing.
- Attaching the Band:
- Wrap the band around the center of the bow.
- Use the long tail to sew the ends of the band together at the back of the bow.
Part 3: Attaching the Hair Clip
- Option 1: Sew a small hair clip or elastic directly to the back of the bow using yarn and a yarn needle.
- Option 2: Use hot glue to attach the clip for a quicker finish.
Finishing & Styling
- Weave in Ends: Use a yarn needle to weave in any loose ends for a clean finish.
- Blocking (Optional): Lightly steam or wet block the bow to smooth out any uneven stitches.
- Styling Ideas:
- Attach the bow to a headband for a cute accessory.
- Use it to decorate a gift or a bag.
- Make multiple bows in different colors to match your outfits!
Customization & Bonus Tips
Customization Ideas:
- Color Variations: Use variegated yarn for a fun, multi-colored look, or try ombre effects.
- Size Adjustments: Make a mini bow by reducing the starting chain, or a larger bow by adding more rows.
- Embellishments: Add beads, buttons, or embroidery for extra flair.
Bonus Tips for Beginners:
- Tension Matters: Keep your stitches tight to ensure the bow holds its shape.
- Practice Makes Perfect: If your first bow isn’t perfect, don’t worry! Crochet is forgiving, and you can always unravel and try again.
- Use Stitch Markers: Mark the center of the bow to make shaping easier.
Final Thoughts
This Crochet Hair Bow Pattern is a simple yet satisfying project that’s perfect for beginners and seasoned crocheters alike. With just a few basic stitches, you can create a versatile accessory that’s both stylish and functional. So grab your hook and yarn, and let’s make something beautiful!