
There’s something magical about bringing beloved characters to life with your own two hands, and this Pikachu crochet pattern is the perfect way to capture that electric charm in yarn form. Whether you’re a Pokémon fan looking to create your own pocket monster or searching for the ideal handmade gift, this adorable amigurumi project combines nostalgia with the meditative joy of crochet.
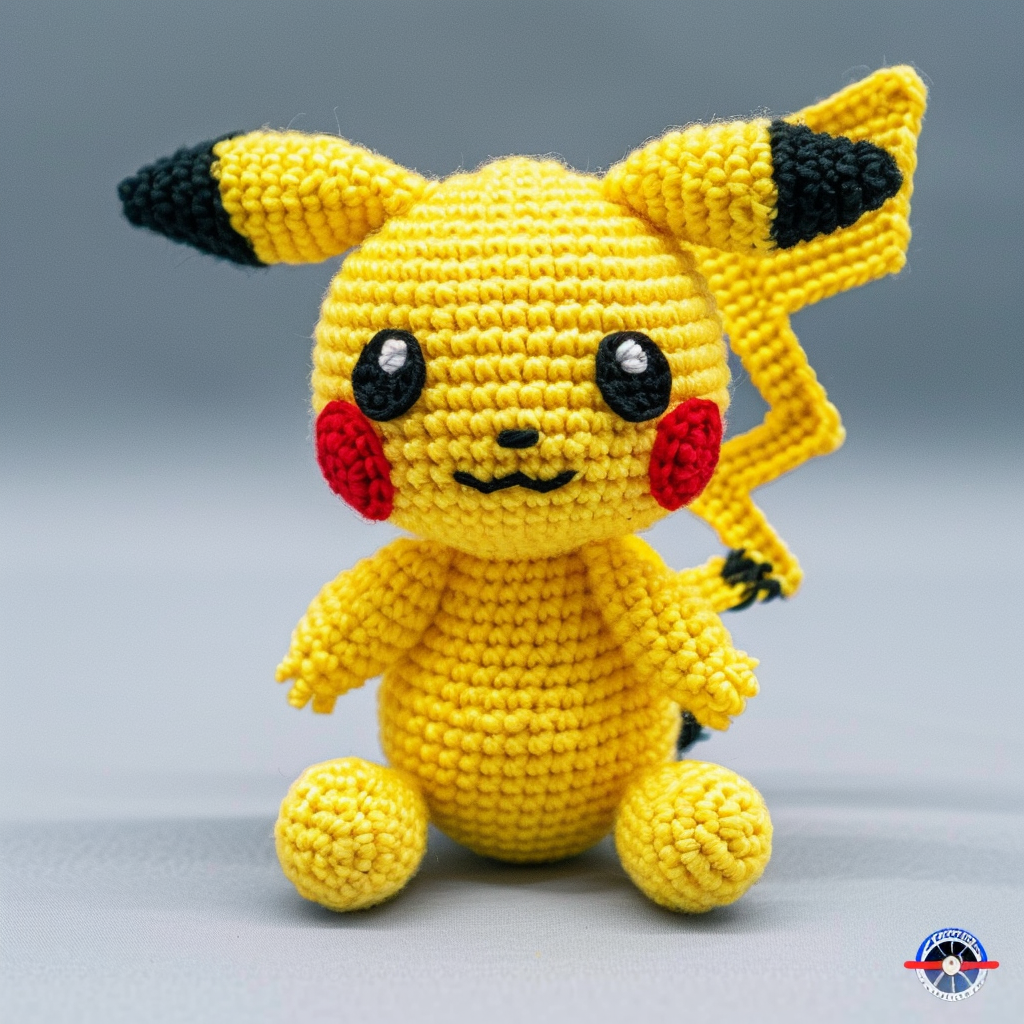
This beginner-friendly pattern transforms simple single crochet stitches into a recognizable and huggable Pikachu that stands approximately 6 inches tall. The bright yellow body, iconic red cheeks, and distinctive lightning bolt tail make this project instantly recognizable and utterly charming. What makes this pattern special is its accessibility – even newer crocheters can successfully create this beloved character while building essential amigurumi skills.
You’ll learn fundamental techniques like working in the round, color changes, basic shaping, and simple embroidery details that will serve you well in future projects. The finished Pikachu isn’t just adorable; it’s a testament to your growing crochet abilities and a conversation starter that brings smiles wherever it goes.
Pattern Overview
This Pikachu amigurumi showcases classic character design elements translated beautifully into crochet form. The pattern utilizes primarily single crochet stitches worked in continuous rounds, creating the smooth, even surface that gives amigurumi its characteristic polished appearance. The construction method involves creating separate body parts – head, body, arms, legs, ears, and tail – which are then assembled to create the final figure.
The design captures Pikachu’s most recognizable features: the rounded, slightly egg-shaped body in vibrant yellow, perky triangular ears with black tips, bright red circular cheeks, and the distinctive zigzag tail. The facial features are carefully positioned to maintain the character’s friendly, approachable expression that has made Pikachu a global icon.
What sets this pattern apart is its attention to proportional accuracy while maintaining structural integrity. The body is designed to sit upright naturally, making it perfect for display or play. The stitch work creates subtle texture that mimics Pikachu’s fur-like appearance in the animated series, while the color placement follows the official character design guidelines.
This intermediate-beginner project introduces color work in a manageable way, with clear color change instructions and minimal yarn management. The pattern builds confidence through repetitive stitching while challenging crafters with new assembly techniques and embroidery details.
Complete Materials List
Yarn Requirements
- Primary Color: Worsted weight yarn in bright yellow (approximately 200 yards)
- Recommended: Red Heart Super Saver in “Bright Yellow” or Lion Brand Vanna’s Choice in “Yellow”
- Accent Colors:
- Black worsted weight yarn (30 yards) for ear tips, tail stripes, and eyes
- Red worsted weight yarn (15 yards) for cheeks
- Small amount of white yarn for eye highlights
- Pink or light pink yarn (10 yards) for inner mouth detail
Tools & Notions
- Size G/6 (4.0mm) crochet hook for main construction
- Size E/4 (3.5mm) crochet hook for detailed work
- Tapestry needle for sewing and embroidery
- Stitch markers (at least 6)
- Small sharp scissors
- Polyester fiberfill stuffing (approximately 2-3 ounces)
- Safety eyes (12mm) or black embroidery floss for crocheted eyes
- Removable stitch markers or bobby pins for assembly planning
Optional Supplies
- Blocking mats for shaping pieces
- Yarn needle threader for fine detail work
- Small crochet hook (steel size) for tiny details
- Measuring tape or ruler
- Digital row counter or notebook for tracking progress
- Wire armature (optional, for poseable limbs)
Sizing & Fit Guide
Finished Measurements
- Height: 6 inches (15cm) when seated
- Width: 4 inches (10cm) at widest point
- Depth: 3.5 inches (9cm) from front to back
Size Variations
This pattern can be easily scaled for different sizes by adjusting hook size and yarn weight:
Mini Pikachu (4 inches tall):
- Use sport weight yarn with size E/4 (3.5mm) hook
- Reduce stuffing amount proportionally
- Perfect for keychains or small gifts
Jumbo Pikachu (9 inches tall):
- Use chunky weight yarn with size K/10.5 (6.5mm) hook
- Increase stuffing significantly for proper shape
- Ideal for room decoration or comfort objects
Gauge Considerations
Achieving proper gauge is crucial for amigurumi success. Your finished fabric should be tight enough that stuffing doesn’t show through stitches, but not so tight that the piece becomes rigid.
Standard Gauge: 16 single crochet stitches = 4 inches with worsted weight yarn and size G hook
If your gauge is too loose, size down your hook. If too tight, size up. Remember that consistent tension is more important than exact gauge measurements, as the character’s proportions matter more than precise sizing.
Detailed Technique Breakdown
Primary Stitches Used
This pattern relies heavily on fundamental crochet techniques, making it perfect for skill building:
Single Crochet (sc): The foundation of amigurumi, creating dense, even fabric Increase (inc): Two single crochet stitches in the same stitch, used for expanding rounds Decrease (dec): Combining two stitches into one, creating shape and closure Magic Ring: Starting technique for seamless rounds Slip Stitch (sl st): For joining rounds and finishing edges
Advanced Techniques
While beginner-friendly, this pattern introduces several intermediate skills:
Color Changes: Learn to switch colors cleanly at the end of rounds and mid-row for striped effects 3D Shaping: Understanding how increases and decreases create dimensional forms Assembly Planning: Visualizing piece placement before sewing for professional results Surface Embroidery: Adding facial features and details with embroidery stitches
Skill-Building Opportunities
This project serves as an excellent stepping stone to more complex amigurumi:
- Consistent tension control
- Reading and following detailed patterns
- Spatial reasoning for 3D construction
- Color work management
- Finishing techniques for professional appearance
Complete Step-by-Step Pattern Instructions
Abbreviations
- sc = single crochet
- inc = increase (2 sc in same stitch)
- dec = decrease (sc2tog)
- sl st = slip stitch
- ch = chain
- st(s) = stitch(es)
- rnd = round
- BLO = back loop only
- FLO = front loop only
Special Stitches
Invisible Decrease (inv dec): Insert hook in front loop of first stitch, then front loop of second stitch, yarn over, pull through both loops (2 loops on hook), yarn over, pull through both loops.
Head Construction
Rnd 1: Magic ring, 6 sc in ring, pull tight (6 sts) Rnd 2: Inc in each st around (12 sts) Rnd 3: Sc, inc repeat around (18 sts) Rnd 4: Sc 2, inc repeat around (24 sts) Rnd 5: Sc 3, inc repeat around (30 sts) Rnd 6: Sc 4, inc repeat around (36 sts) Rnds 7-12: Sc in each st around (36 sts) Rnd 13: Sc 4, dec repeat around (30 sts) Rnd 14: Sc 3, dec repeat around (24 sts) Begin stuffing head firmly but don’t overstuff Rnd 15: Sc 2, dec repeat around (18 sts) Rnd 16: Sc, dec repeat around (12 sts) Rnd 17: Dec around (6 sts) Fasten off, leaving long tail for sewing
Body Construction
Rnd 1: Magic ring, 6 sc in ring (6 sts) Rnd 2: Inc in each st around (12 sts) Rnd 3: Sc, inc repeat around (18 sts) Rnd 4: Sc 2, inc repeat around (24 sts) Rnds 5-10: Sc in each st around (24 sts) Rnd 11: Sc 2, dec repeat around (18 sts) Begin stuffing body Rnd 12: Sc, dec repeat around (12 sts) Rnd 13: Dec around (6 sts) Fasten off, leaving long tail for assembly
Arms (Make 2)
Rnd 1: Magic ring, 6 sc in ring (6 sts) Rnd 2: Inc in each st around (12 sts) Rnds 3-5: Sc in each st around (12 sts) Rnd 6: Sc 4, dec repeat around (10 sts) Rnds 7-9: Sc in each st around (10 sts) Stuff lightly, don’t overstuff arms Rnd 10: Dec around (5 sts) Fasten off, leaving tail for sewing
Legs (Make 2)
Rnd 1: Magic ring, 6 sc in ring (6 sts) Rnd 2: Inc in each st around (12 sts) Rnd 3: Sc, inc repeat around (18 sts) Rnds 4-6: Sc in each st around (18 sts) Rnd 7: Sc, dec repeat around (12 sts) Rnds 8-10: Sc in each st around (12 sts) Stuff legs firmly for stability Rnd 11: Dec around (6 sts) Fasten off, leaving tail for sewing
Ears (Make 2)
With Yellow: Rnd 1: Magic ring, 6 sc in ring (6 sts) Rnd 2: Inc in each st around (12 sts) Rnd 3: Sc, inc repeat around (18 sts) Rnds 4-6: Sc in each st around (18 sts) Change to Black: Rnds 7-8: Sc in each st around (18 sts) Rnd 9: Sc, dec repeat around (12 sts) Rnd 10: Dec around (6 sts) Fasten off, leaving tail for sewing Don’t stuff ears – keep them flat
Lightning Bolt Tail
With Yellow: Create tail in segments, following lightning bolt shape Segment 1 (Top): Ch 12, sc in 2nd ch from hook, sc in next 9 ch, 3 sc in last ch Working down other side: sc in next 9 ch, sl st to first sc Segment 2 (Middle angle): Continue with strategic increases and decreases to create zigzag shape Segment 3 (Bottom point): Work final pointed section Add Black Stripes: Using black yarn, create 3 horizontal stripes across tail using surface slip stitch technique
Assembly Instructions
- Head to Body: Position head on body, ensuring proper alignment. Sew securely with whip stitch, adding extra stuffing if needed for shape.
- Arms: Attach arms to sides of body at shoulder level, approximately 3 rounds down from head attachment.
- Legs: Sew legs to bottom of body, positioning for stable sitting. Ensure even spacing for balance.
- Ears: Position ears on top of head, angled slightly outward. The black tips should point backward.
- Tail: Attach lightning bolt tail to lower back of body, ensuring it extends properly for character recognition.
Facial Features
Eyes: If using safety eyes, insert between rounds 8-9 of head, spaced 6 stitches apart. If embroidering, use black yarn for oval shapes with white highlights.
Cheeks: Create red circles using surface crochet or felt appliqué, positioned below and slightly forward of eyes.
Mouth: Embroider small smile using black yarn, positioned below and between cheeks.
Nose: Small triangle in black, centered above mouth.
Finishing Techniques
- Weave in all loose ends securely
- Shape ears and tail as needed
- Light blocking can help even out stitches
- Final stuffing adjustments for optimal shape
Customization & Variation Ideas
Color Scheme Alternatives
While classic yellow Pikachu is most recognizable, consider these fun variations:
Shiny Pikachu: Replace yellow with golden orange for the rare variant Seasonal Versions: Add small accessories like Santa hats or flower crowns Pastel Pikachu: Use soft yellow with pink cheeks for a gentle aesthetic Rainbow Pikachu: Subtle color gradient from light to bright yellow
Size Modifications
Scale the pattern up or down while maintaining proportions:
- Keychain Size: Use thread and steel hooks for 2-inch versions
- Pillow Size: Scale up dramatically for room décor
- Baby Mobile: Create multiple small versions in soft colors
Style Variations
Sleepy Pikachu: Embroider closed eyes and relaxed posture Action Pose: Wire armature allows for dynamic positioning Sitting vs Standing: Adjust leg positioning and body shape Expression Changes: Vary eye and mouth embroidery for different moods
Embellishment Options
- Sparkle: Add metallic thread highlights
- Texture: Use different yarn weights for contrast
- Accessories: Tiny scarves, bows, or hats
- Sound Effects: Small bells inside for interactive play
Styling & Usage Suggestions
This charming Pikachu works beautifully in multiple settings and applications. As home décor, it adds a playful touch to bookshelves, desks, or children’s rooms while showcasing your crochet skills. The sitting pose makes it perfect for display alongside other collectibles or as a standalone statement piece.
For personal enjoyment, this Pikachu serves as both a comfort object and a conversation starter. Its size makes it ideal for travel companions or office desk buddies. The sturdy construction handles gentle play, making it suitable for children over three years old.
Gift-giving opportunities abound with this versatile pattern. Pokémon fans of all ages appreciate handmade versions of their favorite characters, especially when crafted with obvious care and skill. Consider creating matching sets or entire Pokémon teams for maximum impact.
The seasonal adaptability of this pattern extends its usefulness throughout the year. Add small seasonal accessories or create themed collections for holidays and special occasions.
Skill Level Assessment
Difficulty Rating: Intermediate Beginner
This pattern assumes familiarity with basic crochet stitches but provides detailed guidance for newer techniques. Crocheters should be comfortable with:
- Prerequisites: Single crochet, magic ring, working in rounds
- New Skills Learned: Color changing, 3D shaping, assembly techniques
- Time Investment: 8-12 hours for experienced beginners, 15-20 hours for newer crocheters
The pattern includes troubleshooting guidance and detailed explanations, making it accessible to motivated beginners while remaining engaging for intermediate crocheters seeking a fun, quick project.
Project Applications
Personal Use
This Pikachu pattern serves multiple personal purposes beyond simple decoration. It makes an excellent stress-relief project, with repetitive stitching providing meditative benefits. The portable size allows for travel crafting, and the engaging subject matter maintains interest throughout the construction process.
Gift Ideas
Handmade Pikachu figures make memorable gifts for various occasions: birthdays, holidays, graduation celebrations, or “just because” surprises. The universal appeal of Pokémon characters ensures positive reception across age groups, while the obvious time investment demonstrates genuine care and thoughtfulness.
Charitable Donations
Consider creating Pikachu amigurumi for children’s hospitals, where bright, cheerful handmade toys bring comfort during difficult times. Local shelters, daycare centers, and community organizations often welcome quality handmade donations, especially when they feature beloved characters that spark joy and conversation.
Business Opportunities
This pattern can serve as a foundation for craft fair sales, custom orders, or online marketplaces. The recognizable character design and quality construction command good prices, while the relatively quick completion time allows for profitable production. Consider offering customization options like different sizes, colors, or accessories to increase value and uniqueness.
Frequently Asked Questions
Q: Can I sell items made from this pattern? A: Yes, you may sell finished items created from this pattern. Please credit the pattern designer appropriately.
Q: What if my Pikachu won’t sit up straight? A: Ensure adequate stuffing in the bottom and legs. Consider adding small weights or adjusting leg positioning.
Q: Can I make this without safety eyes? A: Absolutely! Embroidered eyes are completely safe and often look more integrated with the overall design.
Q: How do I achieve clean color changes? A: Complete the last stitch of the old color until two loops remain on hook, then pull through with new color.
