

There’s something magical about bringing a touch of nature indoors, especially when that nature never needs watering, sunlight, or worried glances when you forget to tend to it for weeks. This charming mini crochet succulent pattern creates the perfect solution for plant lovers who struggle with keeping real plants alive, or anyone who wants to add a pop of green to their workspace without the maintenance.
This delightful little succulent combines the satisfaction of creating something beautiful with your own hands and the joy of having permanent greenery that brightens any space. The intricate leaf details and perfectly proportioned pot make this project both rewarding to create and stunning to display. Whether you’re a seasoned crocheter looking for a quick, satisfying project or a beginner ready to tackle your first amigurumi-style creation, this crochet succulent pattern delivers both charm and accomplishment in a compact package.
Pattern Overview
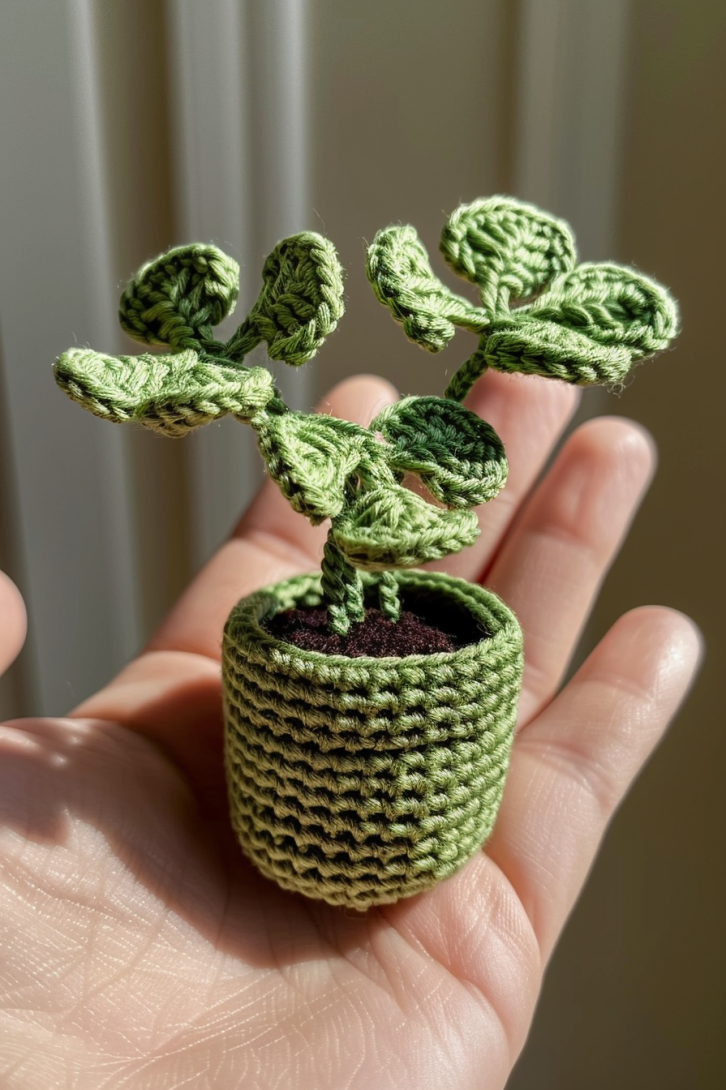
This miniature crochet succulent showcases beautiful dimensional leaf work that creates realistic texture and visual interest. The pattern features a clever combination of basic single crochet techniques with more advanced shaping methods to achieve the characteristic thick, fleshy appearance of succulent leaves. The graduated green color scheme, ranging from deep forest green to soft sage, mimics the natural variations found in real succulents.
The construction method involves creating the pot base first using continuous rounds of single crochet, then crafting individual leaves that are attached to create the full, lush appearance. The leaves are worked in a distinctive pattern that creates natural curving and dimensional effects, making each leaf appear to have the thick, water-storing quality that defines real succulents.
This pattern is perfect for intermediate crocheters who are comfortable with basic stitches and ready to explore more advanced shaping techniques. The project requires attention to detail and patience with small-scale work, but the payoff is enormous. Each completed succulent measures approximately 2.5 inches tall and 2 inches wide, making it ideal for desk décor, shelf styling, or as part of a larger arrangement.
The entire project can be completed in 3-4 hours, making it perfect for weekend crafting sessions or as a thoughtful handmade gift. The compact size means you can easily work on it anywhere, and the yarn requirements are minimal, making it an economical project that delivers maximum visual impact.
Materials List
Yarn Requirements:
- Worsted weight cotton yarn (Size 4) in multiple green shades:
- Deep forest green: 25 yards
- Medium sage green: 20 yards
- Light mint green: 15 yards
- Small amount of dark brown yarn for soil: 10 yards
- Cotton yarn provides the best structure and stitch definition for this project
Hook Sizes:
- Primary hook: Size F/5 (3.75mm) for tight, structured stitches
- Optional: Size E/4 (3.5mm) for ultra-tight leaf work
Essential Notions:
- Polyester fiberfill stuffing (small amount)
- Tapestry needle for seaming and weaving in ends
- Stitch markers (at least 6) for marking leaf placement
- Small scissors for precise trimming
Optional Supplies:
- Blocking mats for shaping leaves
- Spray bottle for light misting during blocking
- Small rice or plastic pellets for pot weight (optional)
- Craft glue for extra security on leaf attachments
Sizing & Fit Guide
Finished Measurements:
- Total height: 2.5 inches (6.5 cm)
- Pot diameter: 1.5 inches (3.8 cm)
- Pot height: 1 inch (2.5 cm)
- Leaf span: 2 inches (5 cm) across
Sizing Variations: This pattern can be easily adjusted for different sizes by changing hook size and yarn weight. For a larger version, use a Size G/6 hook with worsted weight yarn for approximately 30% size increase. For tiny versions perfect for fairy gardens, use Size D/3 hook with DK weight yarn for a delicate 1.5-inch finished height.
Gauge Considerations: Gauge is crucial for this pattern to achieve the proper proportion and structure. Work a gauge swatch in single crochet using your chosen yarn and hook. You should achieve 18 stitches and 20 rows per 4 inches. If your gauge is too loose, the pot won’t hold its shape and the leaves will appear floppy. If too tight, the fabric will be stiff and difficult to shape.
Fit Preferences: The leaves should have a natural curve and slightly cupped appearance. If your tension is too tight, the leaves will lay flat. If too loose, they’ll be floppy and lack the characteristic succulent appearance. Practice with scrap yarn to find your ideal tension before beginning the final project.
Detailed Technique Breakdown
Primary Stitches Used: This pattern relies heavily on single crochet (sc) worked in continuous rounds and short rows. You’ll also use half double crochet (hdc) for leaf shaping and slip stitches (sl st) for seamless transitions. The magic ring technique is essential for starting both the pot base and individual leaves.
Advanced Techniques Required:
- Short rows: Used to create the natural curve in succulent leaves
- Invisible decreases: Maintains smooth shaping in the pot
- Working in front loops only: Creates texture lines in the pot
- Strategic color changes: Seamless transitions between green shades
- Dimensional assembly: Attaching leaves at varying angles for realistic appearance
Skill-Building Opportunities: This pattern is excellent for practicing consistent tension, which is crucial for amigurumi-style projects. You’ll master the art of creating dimension through strategic increases and decreases, and learn how color placement affects the overall visual impact of your finished piece.
Prerequisites for Success: Before beginning, ensure you’re comfortable with reading stitch counts, working in continuous rounds without joining, and maintaining consistent tension throughout your work. Basic knowledge of increasing and decreasing techniques is essential, as is the ability to work with multiple colors confidently.
Complete Step-by-Step Pattern Instructions
Stitch Abbreviations
- ch = chain
- sc = single crochet
- hdc = half double crochet
- sl st = slip stitch
- inc = increase (2 sc in same stitch)
- dec = decrease (single crochet 2 together)
- mr = magic ring
- FLO = front loops only
- BLO = back loops only
Special Techniques
Invisible Decrease: Insert hook in front loop of next stitch, then front loop of following stitch, yarn over and pull through both loops on hook, yarn over and pull through both loops.
Short Row Shaping: Turn work before completing the round, chain 1, and work back across specified number of stitches to create curvature.
Pattern Instructions
Pot Base (Dark Brown)
- Foundation: Start with mr, 6 sc in ring, pull tight (6 sts)
- Round 1: 2 sc in each st around (12 sts)
- Round 2: sc in next st, inc repeat around (18 sts)
- Round 3: sc in next 2 sts, inc repeat around (24 sts)
- Rounds 4-6: sc in each st around (24 sts)
- Round 7: Working in FLO, sc in each st around (24 sts)
- Rounds 8-12: sc in each st around (24 sts)
- Round 13: sc in next 2 sts, dec repeat around (18 sts)
- Round 14: sc in next st, dec repeat around (12 sts)
- Stuff firmly and close opening
Large Leaves (Deep Forest Green) – Make 3
- Foundation: Ch 8, sc in 2nd ch from hook and next 5 ch, 3 sc in last ch
- Working on opposite side: sc in next 5 ch, 2 sc in last ch (16 sts)
- Round 1: sc in next 6 sts, inc in next 3 sts, sc in next 6 sts, inc (20 sts)
- Round 2: sc in next 7 sts, inc, sc in next st, inc, sc in next st, inc, sc in next 7 sts, inc (24 sts)
- Rounds 3-5: sc in each st around (24 sts)
- Short row shaping: Turn, ch 1, sc in next 12 sts, turn, ch 1, sc in next 12 sts
- Fasten off, leaving long tail for sewing
Medium Leaves (Sage Green) – Make 4
- Foundation: Ch 6, sc in 2nd ch from hook and next 3 ch, 3 sc in last ch
- Working on opposite side: sc in next 3 ch, 2 sc in last ch (12 sts)
- Round 1: sc in next 4 sts, inc in next 3 sts, sc in next 4 sts, inc (16 sts)
- Rounds 2-3: sc in each st around (16 sts)
- Short row shaping: Turn, ch 1, sc in next 8 sts, turn, ch 1, sc in next 8 sts
- Fasten off, leaving long tail for sewing
Small Leaves (Light Mint Green) – Make 6
- Foundation: Ch 4, sc in 2nd ch from hook and next ch, 3 sc in last ch
- Working on opposite side: sc in next ch, 2 sc in last ch (8 sts)
- Round 1: sc in next 2 sts, inc in next 3 sts, sc in next 2 sts, inc (12 sts)
- Round 2: sc in each st around (12 sts)
- Fasten off, leaving long tail for sewing
Soil Insert (Dark Brown)
- Foundation: mr, 6 sc in ring (6 sts)
- Round 1: 2 sc in each st around (12 sts)
- Round 2: sc in next st, inc repeat around (18 sts)
- Fasten off
Assembly Instructions
- Prepare the pot: Stuff firmly with fiberfill, ensuring the bottom is flat and stable
- Insert soil piece: Place the crocheted soil insert in the top opening of the pot
- Attach large leaves: Position the three large leaves evenly around the pot, sewing through both the leaf base and the soil insert
- Add medium leaves: Fill gaps between large leaves with medium leaves, varying the heights slightly
- Finish with small leaves: Tuck small leaves into remaining spaces, creating a full, lush appearance
- Secure all connections: Ensure all leaves are firmly attached with several small stitches
- Final shaping: Gently curve each leaf to create natural, dimensional appearance
Troubleshooting Common Issues
Leaves won’t hold their shape: Check your tension – it should be firm but not tight. Block leaves lightly with spray mist if needed.
Pot is wobbly: Ensure you’ve stuffed firmly and consider adding rice or small pellets to the bottom for weight.
Color changes are visible: When switching colors, always change on the last yarn over of the previous stitch.
Leaves appear flat: The short row shaping is crucial – don’t skip this step, as it creates the natural curve.
Customization & Variation Ideas
Transform this basic succulent pattern into countless variations by experimenting with color combinations and leaf arrangements. Try creating a purple-toned succulent using deep plum, lavender, and soft pink shades for a more exotic appearance. Desert-inspired versions using warm oranges, deep reds, and golden yellows can create stunning autumn displays.
For seasonal adaptations, consider adding tiny crocheted flowers in spring colors, or create winter versions using silvery greens and whites. The pot itself offers customization opportunities – work in natural terracotta colors, or try modern metallics like copper or bronze for contemporary décor.
Size modifications are simple with hook and yarn weight changes. Create a family of succulents in varying sizes, or scale up dramatically for statement pieces. Consider textural variations by working some leaves in different stitch patterns – try working in back loops only for ridged effects, or alternate between single and half double crochet for varied textures.
Advanced crocheters can experiment with more complex leaf shapes, creating pointed varieties or adding surface embellishments like French knots for texture details. The assembly process also offers creative opportunities – try asymmetrical arrangements or clustering multiple varieties in larger containers.
Styling & Usage Suggestions
These miniature succulents shine in modern office environments, bringing life to desk spaces without maintenance concerns. Group several together on floating shelves for dramatic visual impact, or use them as scattered accents throughout bookshelves and display cases. Their compact size makes them perfect for small apartment living where every inch of space matters.
Consider seasonal styling opportunities – arrange them with other autumn décor for fall displays, or pair with white and silver accents for winter wonderlands. They make exceptional housewarming gifts, teacher appreciation presents, or hostess gifts that recipients will treasure long after fresh flowers have faded.
The neutral green palette works beautifully with both warm and cool color schemes, making these succulents versatile enough for any decorating style. Use them to bridge color gaps in existing décor, or let them serve as the starting point for entirely new color stories in your space.
Skill Level Assessment
Difficulty Rating: Intermediate
This pattern requires solid foundation skills in basic crochet techniques, but introduces several intermediate-level concepts that make it perfect for skill building. The combination of dimensional shaping, color work, and assembly techniques provides excellent practice for crocheters ready to advance their skills.
Required Prerequisites:
- Comfortable with single crochet and basic increases/decreases
- Experience working in continuous rounds
- Basic understanding of tension control
- Ability to read and follow multi-step instructions
Estimated Completion Time: 3-4 hours for experienced intermediate crocheters, 5-6 hours for confident beginners tackling their first dimensional project.
Learning Opportunities: This pattern teaches valuable skills in three-dimensional construction, color coordination, and assembly techniques that will serve well in future amigurumi and decorative projects. The short row shaping technique is particularly valuable for creating natural-looking curves in any project.
Project Applications
Personal Use: Perfect for personal workspace decoration, bedroom styling, or anywhere you want low-maintenance greenery. The compact size makes them ideal for small spaces, dorm rooms, or apartments where live plants might not thrive.
Gift Ideas: Exceptional choices for teacher appreciation, housewarming gifts, or presents for friends who love plants but struggle to keep them alive. Consider creating sets of different sizes or colors for wedding favors or party gifts.
Charitable Donations: These cheerful little succulents bring joy to nursing home residents, hospital patients, or anyone in environments where live plants aren’t practical. Their permanent nature means they’ll provide long-lasting happiness.
Business Opportunities: High demand at craft fairs, farmers markets, and online marketplaces. Consider creating themed collections, seasonal versions, or custom colors to match specific décor needs. The quick completion time and minimal materials make them profitable craft fair items.
Skill Development: This pattern serves as an excellent stepping stone to more complex amigurumi projects, teaching essential techniques for dimensional work, color coordination, and professional finishing methods.
Ready to Create Your Own Crochet Succulent Garden?
This delightful mini succulent pattern offers the perfect combination of creativity, skill-building, and instant gratification. Whether you’re crafting for your own space or creating thoughtful gifts, these charming little plants bring permanent beauty to any environment.
Start your succulent collection today and discover the joy of creating something beautiful that will brighten spaces for years to come. Share your finished projects on social media using #CrochetSucculentLove to connect with other plant-loving crafters and inspire others to try this rewarding pattern.
