Introduction
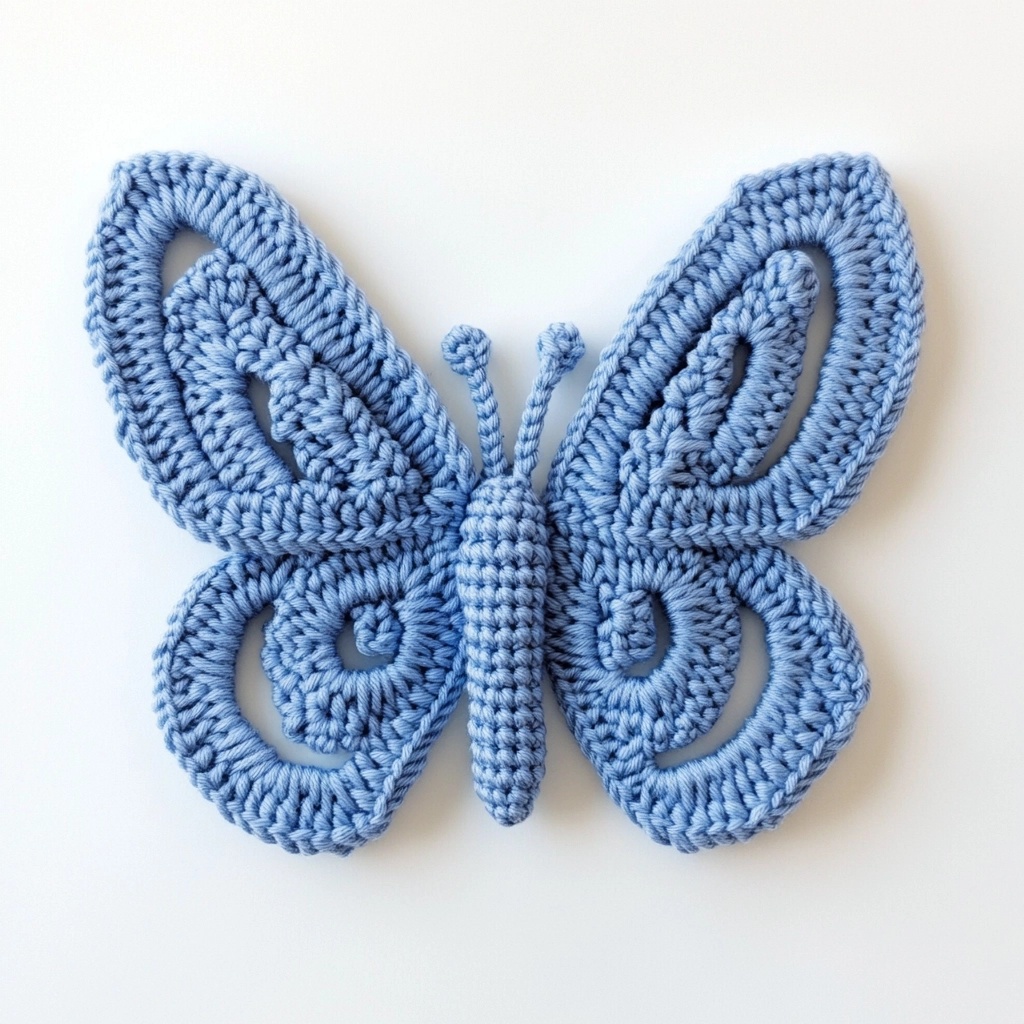
This delicate and charming Crochet Butterfly is a perfect project for beginners and experienced crocheters alike! This pattern is quick to make, great for gifting, and can be used as appliqué for clothing, bags, or home décor. You can even turn it into a brooch or keychain.
- Skill Level: Beginner to Intermediate
- Features: Textured, lightweight, and customizable
Materials & Supplies
- Yarn: Medium-weight (worsted) cotton yarn or any yarn of choice
- Recommended Brand: Lily Sugar’n Cream, Bernat Handicrafter, or any soft cotton yarn
- Hook Size: 4.0mm (G-6) or as recommended for your yarn
- Other Tools:
- Yarn needle for weaving in ends
- Scissors
- Stitch markers (optional)
Size & Gauge Information
- Finished Size: Approximately 4 inches wide and 3 inches tall (varies based on yarn weight and hook size)
- Gauge: Not crucial for this pattern
- Resizing: Use a larger hook and thicker yarn for a bigger butterfly or a smaller hook and finer yarn for a smaller one
Crochet Abbreviations & Terms
- CH – Chain
- SC – Single Crochet
- HDC – Half Double Crochet
- DC – Double Crochet
- TR – Treble Crochet
- SL ST – Slip Stitch
- SP – Space
- ST – Stitch
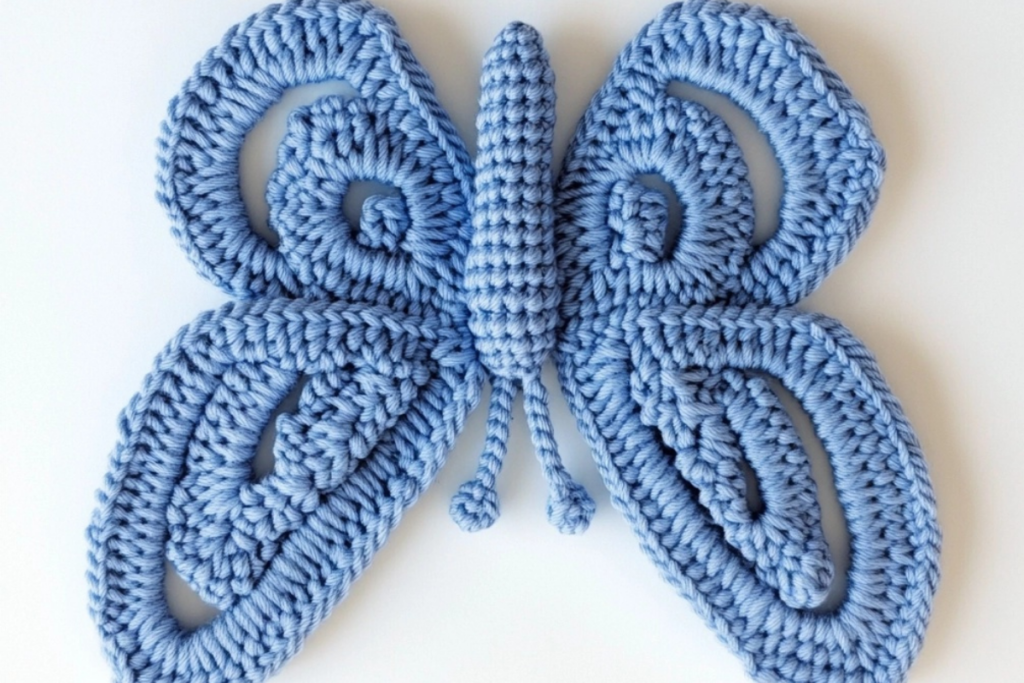
Step-by-Step Instructions
Butterfly Wings (Make 2 for each side)
- Start with a magic ring, or CH 4 and SL ST into the first CH to form a ring.
- Round 1: CH 3 (counts as first DC), make 11 DC into the ring. SL ST into the top of the CH 3. (12 DC total)
- Round 2: CH 3, DC in same ST, 2 DC in each ST around. SL ST to join. (24 DC total)
- Round 3 (Shaping the wings):
- (Large upper wing) CH 4, in next ST work 2 TR, CH 3, SL ST.
- (Small lower wing) CH 3, in next ST work 2 DC, CH 2, SL ST.
- Repeat the above steps around to complete the four butterfly wings.
- Fasten off and weave in ends.
Butterfly Body and Antennae
- CH 10, SL ST into the 2nd CH from the hook.
- SC into the next 8 stitches (this forms the body).
- Antennae: CH 4, SL ST back into the first CH, repeat for the second antenna.
- Fasten off, leaving a long tail to sew the body onto the wings.
Assembly
- Place the two wing pieces together, aligning them evenly.
- Sew the butterfly body in the center of the wings.
- Adjust and shape the wings by gently stretching and blocking them.
Finishing & Styling
- Weave in all ends neatly with a yarn needle.
- Optional blocking: Lightly dampen and pin the butterfly to a foam board to shape it properly.
- Ways to use it: Sew onto hats, scarves, baby blankets, or attach a pin to make a brooch.
Customization & Bonus Tips
- Color Variations: Experiment with multi-colored yarn or use different colors for the upper and lower wings.
- Edging Detail: Add a row of slip stitches around the wings for a more finished look.
- Sparkle & Embellishments: Use embroidery thread for details or sew tiny beads onto the wings.
Enjoy Your Handmade Butterfly!
This simple yet elegant crochet butterfly is a versatile and fun project. Experiment with different yarns and colors to create unique designs. Happy crocheting!
