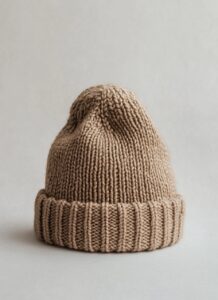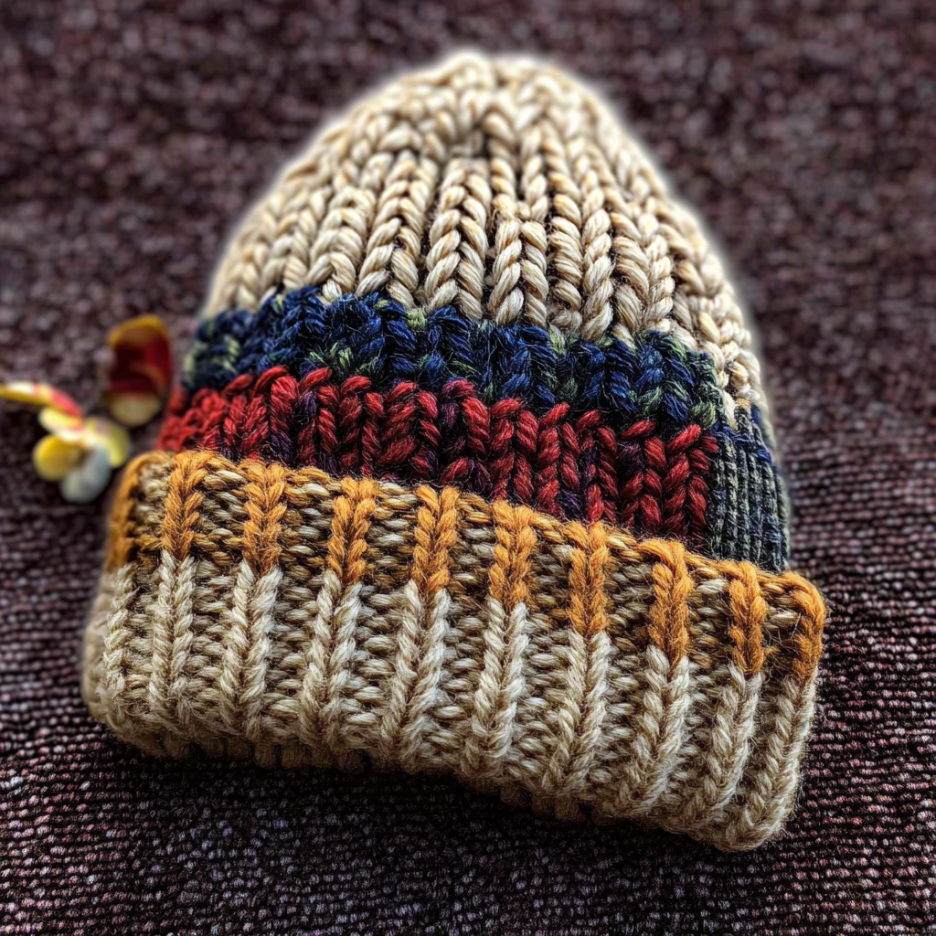
Introduction
Stay warm and stylish with this Cozy Ridge Beanie, a beginner-friendly crochet hat perfect for chilly days. This textured hat features beautiful ribbing, a snug fit, and a stretchy brim, making it both functional and fashionable. Whether you’re making it for yourself, as a gift, or to sell at craft fairs, this quick and easy project is sure to become a favorite!
Skill Level: Beginner
Key Features:
Easy to make, perfect for beginners
Beautiful texture with a snug fit
Ideal for gifts or personal wear
Materials & Supplies
To create this hat, you will need:
- Yarn: Worsted weight (#4) yarn – We recommend Lion Brand Wool-Ease or Red Heart Soft for a cozy and warm feel.
- Crochet Hook: 5.5mm (I-9) hook
- Other Tools:
- Yarn needle (for weaving in ends)
- Scissors
- Stitch markers (optional)
Size & Gauge Information
- Standard Adult Size: Circumference: 20” (stretches to fit 22”), Height: 8.5”
- Gauge: 14 stitches x 10 rows = 4” in Half Double Crochet (HDC)
- Adjusting the Size:
- Increase/decrease the starting chain for width.
- Add/reduce the number of rows for height.
Crochet Abbreviations & Terms
(Using US Terminology)
- CH – Chain
- SC – Single Crochet
- HDC – Half Double Crochet
- BLO – Back Loop Only
- SL ST – Slip Stitch
- ST(s) – Stitch(es)
Step-by-Step Instructions
Step 1: Start the Brim
- CH 9 (or adjust for a thicker brim).
- Row 1: SC in the 2nd CH from hook and across. (8 STs)
- Row 2: CH 1, turn. SC in BLO across. (8 STs)
- Repeat Row 2 until the brim measures 20 inches (or desired circumference).
Step 2: Join the Brim & Start the Body
- Fold the brim in half and SL ST through both loops to form a circle.
- CH 1, work HDC evenly around the top of the brim. (Approx. 64 STs)
- Join with a SL ST to the first HDC.
Step 3: Crochet the Hat Body
- Round 1: CH 1. HDC in BLO around. SL ST to join.
- Repeat Round 1 until the hat is 8 inches tall (or desired height).
Step 4: Shape the Crown
- Decrease Round: CH 1, HDC in next 6 STs, HDC2TOG around. SL ST to join.
- Next Rounds: Continue decreasing (HDC in next 5 STs, HDC2TOG around) until you have about 8-10 STs left.
Finishing & Styling
- Cut the yarn, leaving a long tail.
- Use a yarn needle to weave the tail through the remaining stitches and pull tight to close the top.
- Secure and weave in all loose ends.
- (Optional) Attach a pompom for extra style!
Customization & Bonus Tips
Color Variations: Try using multiple colors or variegated yarn for a unique look.
Different Stitches: Instead of HDC, try using DC or SC for a different texture.
Beginner Tip: If your brim feels too tight, go up a hook size for the first few rows